


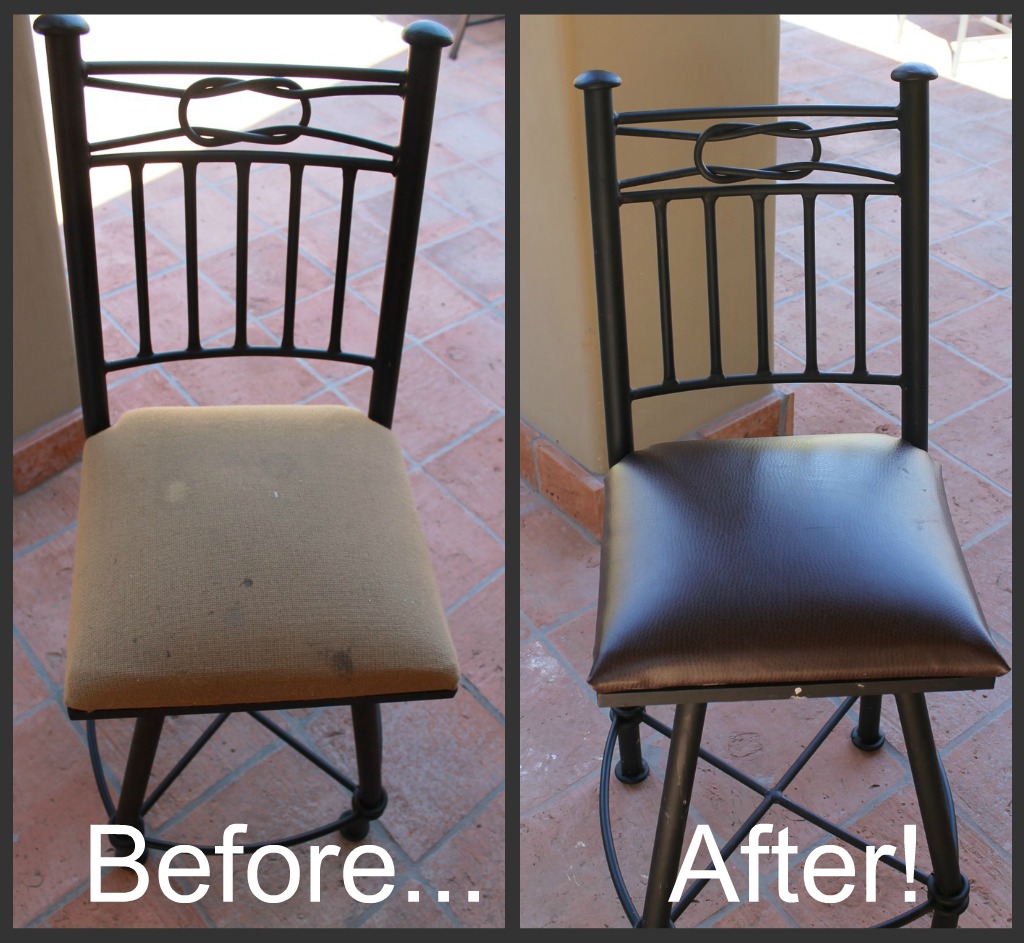
This is a great project to give your existing furniture an inexpensive update – or give a new piece your own style!
Our kitchen bar stools get a lot of use and therefore quite dirty. My daughter Baylor’s highchair used to connect to one and now she seats herself at “her” stool for each meal – which is stained as a result. I set out to find an inexpensive and simple solution and decided that recovering them myself was the perfect fit. I recovered 4 bar stools for $18. And a benefit besides the cost? I had to prove to my friend that I had recovered the chairs myself and that it was easy-to-clean vinyl rather than actual ostrich leather!
What you’ll need:
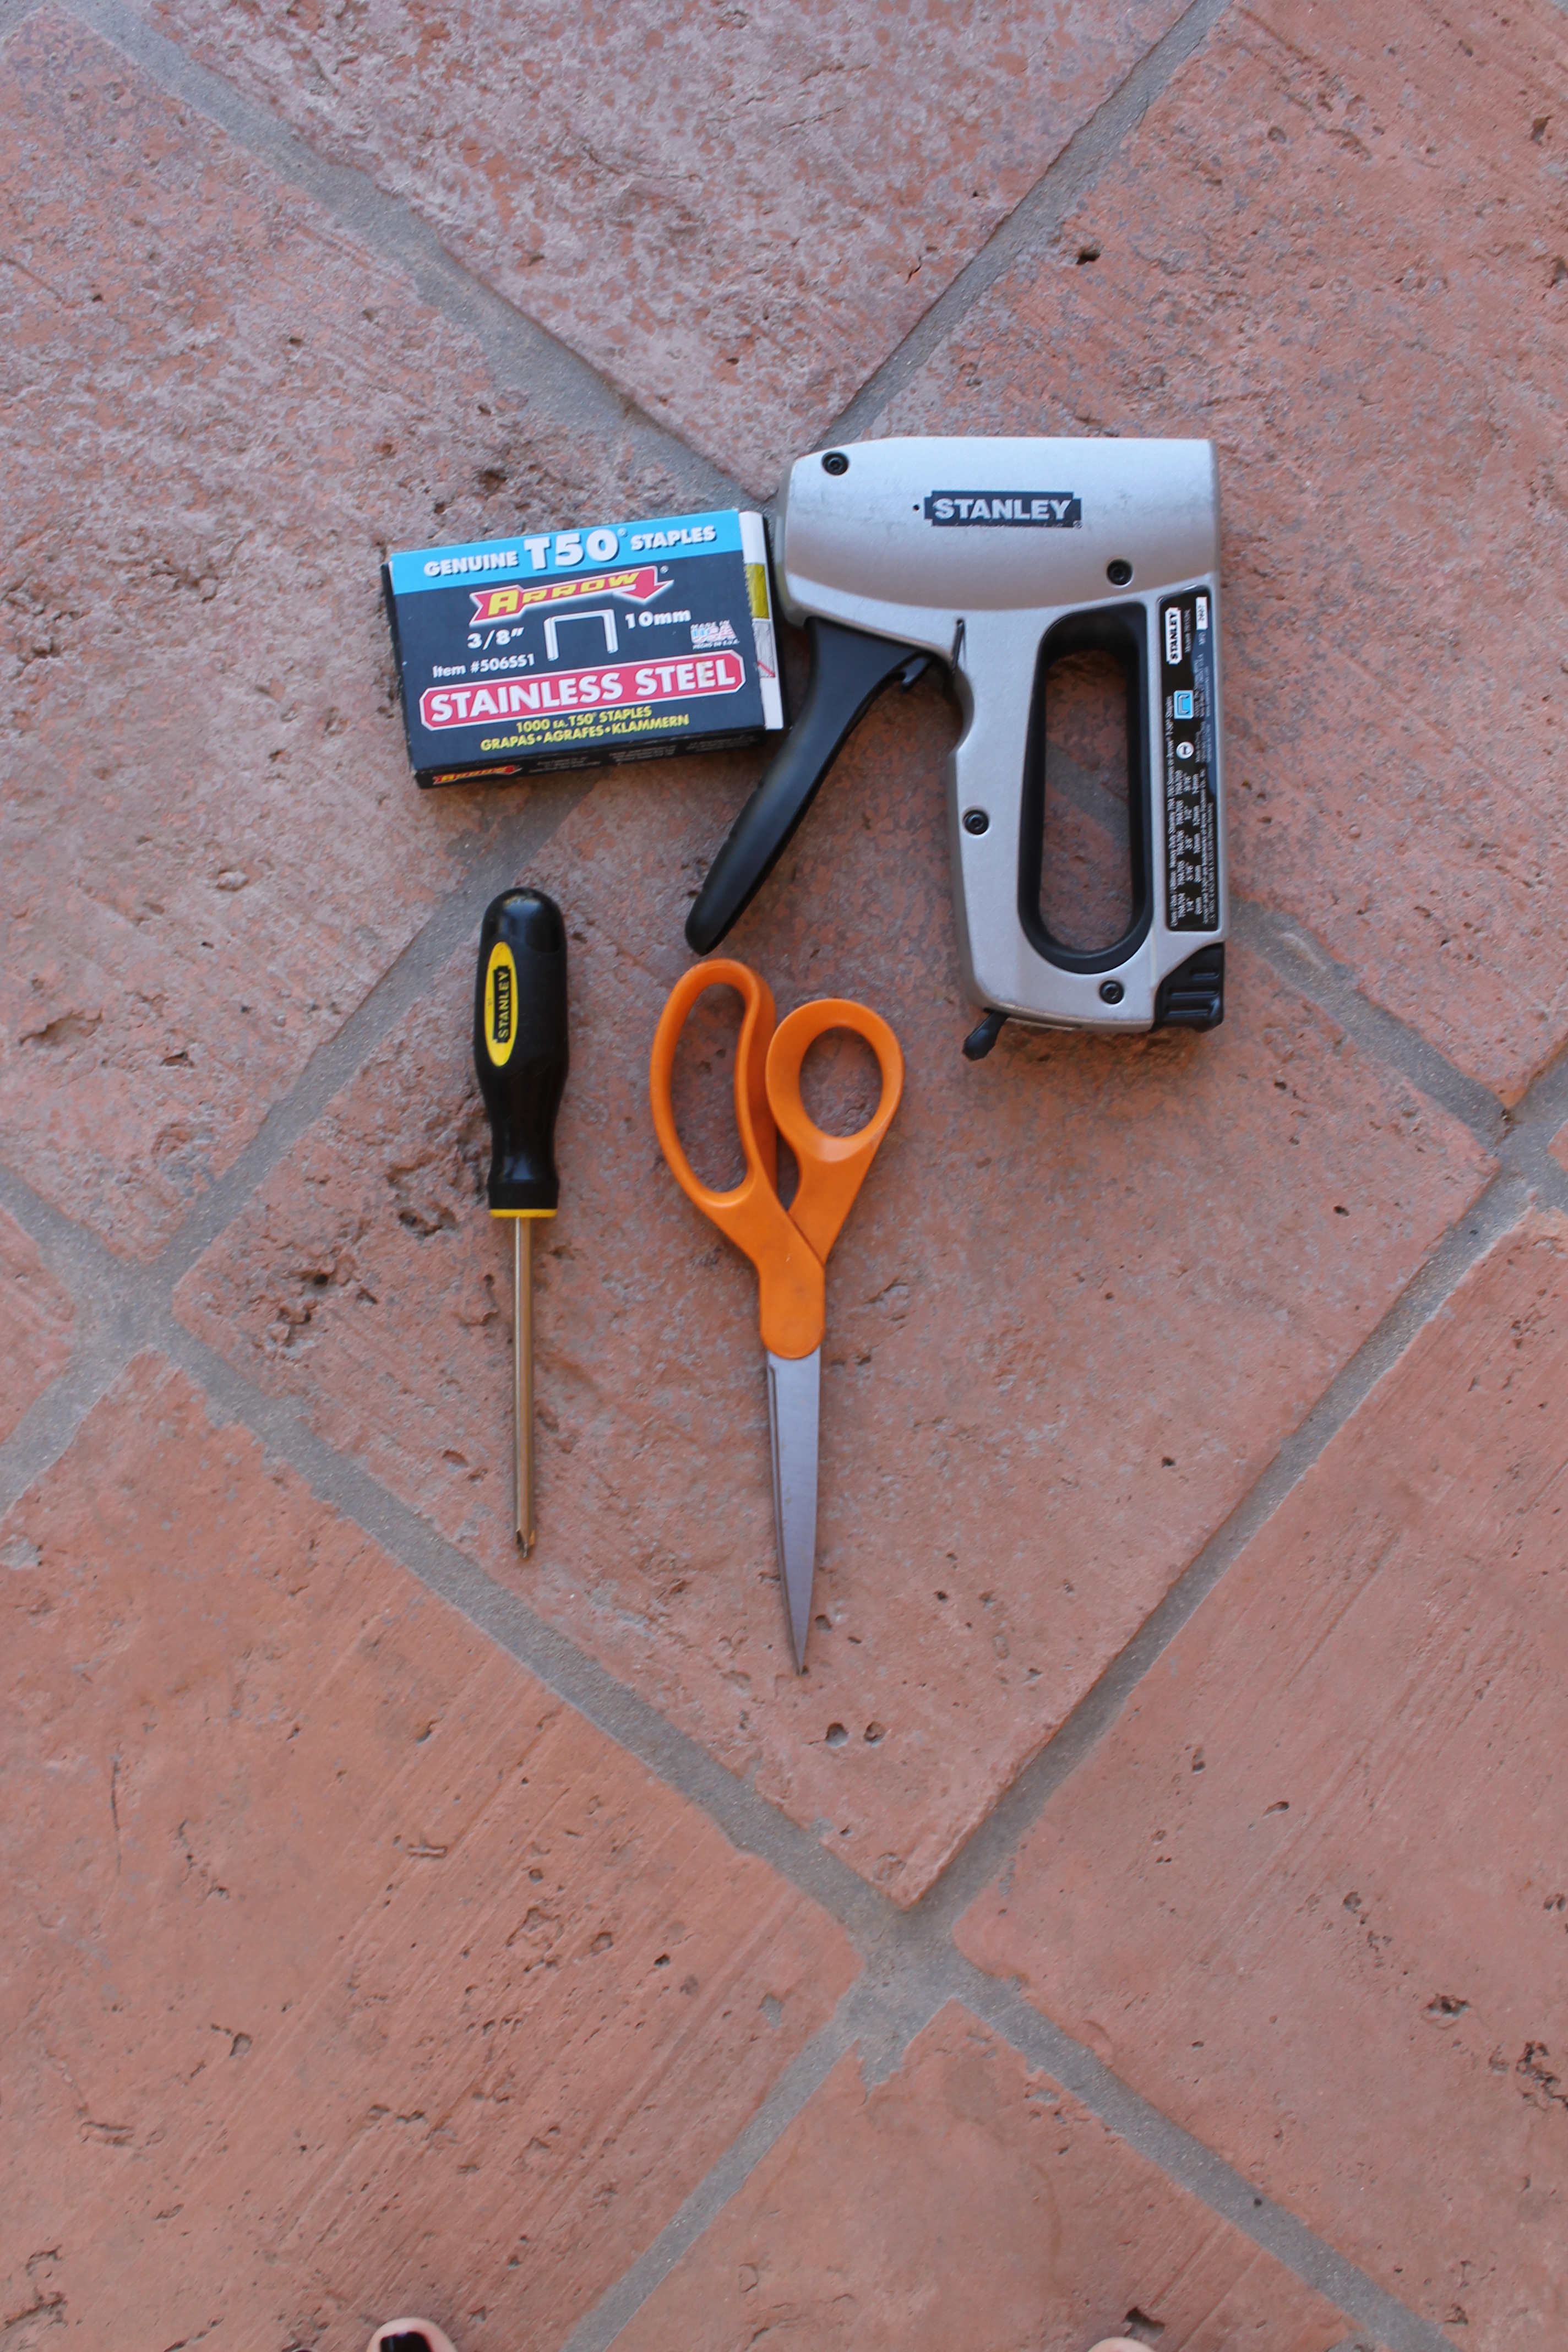
1. Chair cushions that have a hard underside like heavy cardboard or wood.
2. Fabric.
3. Staple gun and heavy staples.
4. Scissors.
5. Screwdriver.
6. Second set of hands. This isn’t necessary, but it really comes in handy (pun intended).
Directions:
1. Clean the cushions. This is to make sure that there is no chance of something funky growing under the new fabric.
2. Measure. Measure the length, width and height of your cushions. Remove them from the frame to get a more accurate measurement. Bring the measurements with you to the fabric store. **Note: I was set to purchase about double the amount of fabric that I actually needed based on my measurements when the sales lady asked me what I was making. When I told her, she gave me a better estimate. I added a little extra for any “oops” that might occur and I still had a lot left over. It’s helpful to ask the experts for assistance!
3. Pick your fabric. Think about how you use the seats – are they outside? Do they get dirty often? Are they highly visible? Then purchase accordingly. I love Fabric Depot and Supply. They are the self-titled “DIY Kings!” They have a huge selection of fabric that includes vinyl and leathers. There are also tons of accessories: metal studs, tassels, trim, etc. If you’re stumped on which type of fabric to choose, go and wander around to see what catches your eye.
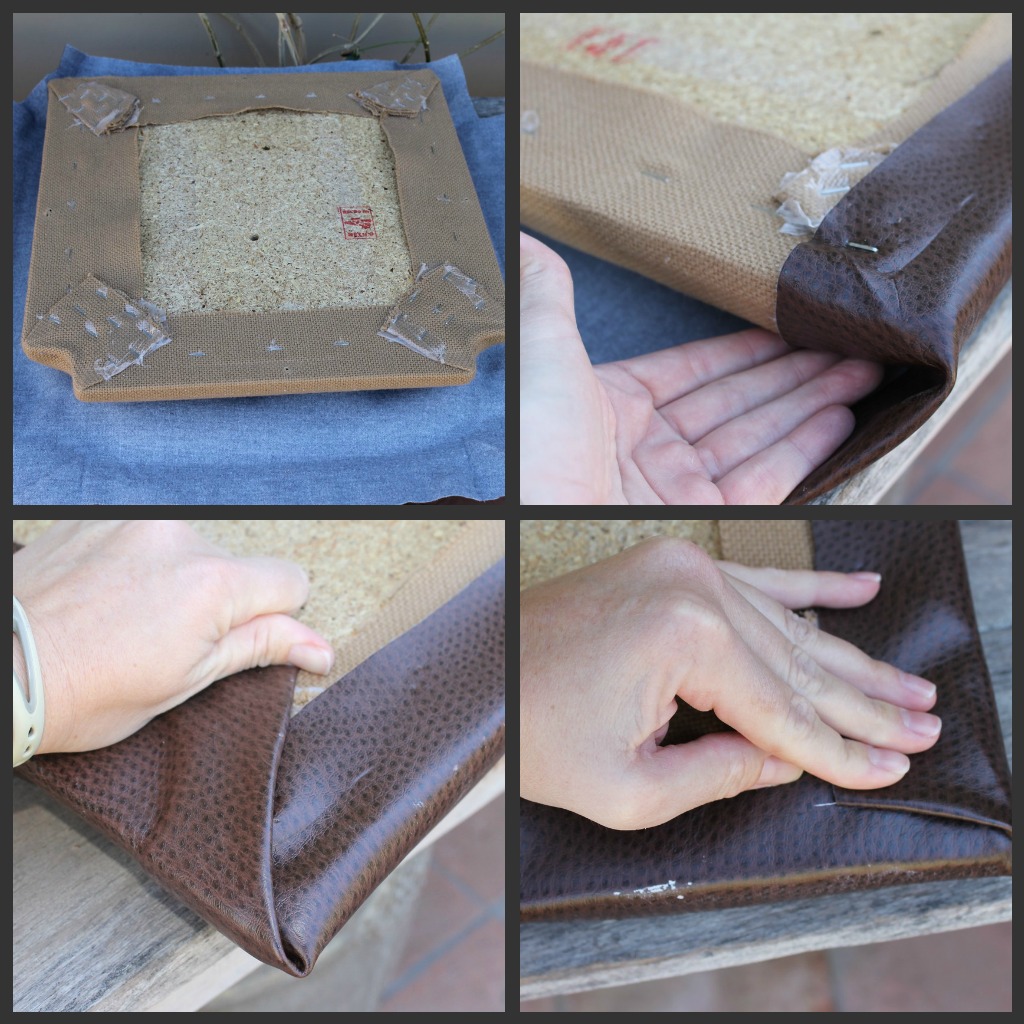 4. Lay it out. Layout your fabric right side down on a large work space, like a dining room table. Place one cushion face down on the fabric – just like you would wrap a present.
5. Wrap it up. Much like wrapping a present, fold one side of the fabric inward and staple. Then, fold a corner in – this may require some cutting of the fabric or tucking it under to make the corner neat. Take note how you wrap each corner so that they all match. Repeat with each side and corner until all are complete. Be sure to pull each section tightly. No one will see the staples or the underside so don’t worry about being fancy with the staples.

6. Put It Back. If all the sides and corners look good, place the cushion back on the frame. Make sure that it is even on the frame. From the underside, mark with the screw driver (or a pen) where the holes for the screws go. Pull the cushions back off and make holes using the screwdriver so that the screws go back in the original holes.
7. Finish it off. Screw the cushions back onto the frames and voila! You’re done!
 Expert post from Luxe Baby")
")


")
I am totally going to do this to my living room chairs! They need a fabric that can be easily cleaned! Thank you SOOOOOOOOOOOo much for sharing your wisdom and craftyness!
Comments are closed.